cook
cook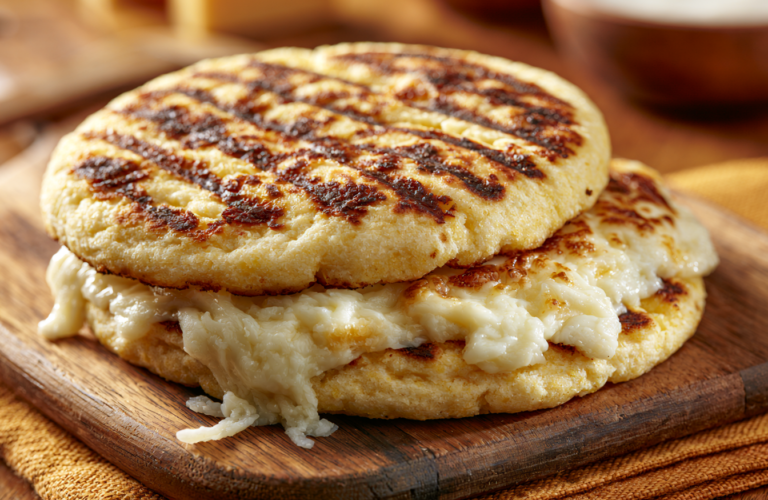

Arepas are one of the most beloved foods in Colombia and Venezuela—warm, pillowy corn cakes that can be stuffed with just about anything. Whether you fill them with shredded chicken, creamy cheese, black beans, or avocado, they’re a complete meal that comes together quickly and tastes absolutely incredible.

What are arepas?
Arepas are round, flat cakes made from cornmeal, water, and salt, then cooked on a griddle until golden and cooked through. They’re naturally gluten-free, versatile, and deeply satisfying. The beauty of arepas is that you can fill them with whatever you have on hand—they’re part bread, part vessel, completely delicious.
Why you’ll love it
- Naturally gluten-free and made with just a handful of simple ingredients
- Versatile filling options mean you can customize them for any meal or diet
- Budget-friendly, quick to make, and perfect for breakfast, lunch, or dinner
Ingredients (serves 8, makes 8 arepas)
| Ingredient | Amount | Where to find it / Substitutes |
|---|---|---|
| Cornmeal (masarepa or polenta) | 240 g (2 cups) | International or Latin foods aisle; must be finely ground |
| Warm water | 480 ml (2 cups) | Tap water, room temperature |
| Salt | 1 tsp | Pantry staples |
| Butter or vegetable oil | 2 tbsp | Pantry staples |
| Shredded cooked chicken, or refried beans, or cheese (filling) | 400 g (1.5 cups) | Rotisserie chicken or canned beans or dairy aisle |
| Avocado, sliced (optional filling) | 1 ripe | Produce section |
| Fresh cilantro, chopped (optional topping) | 2 tbsp | Fresh herbs section |
Allergens: Corn (in cornmeal). If using cheese, check for dairy allergens. If using meat filling, ensure it is fully cooked through. Arepas are naturally gluten-free.
How to make it
-
Make the dough: In a large bowl, combine the cornmeal and salt. Gradually pour in the warm water, stirring constantly with a wooden spoon or fork to avoid lumps. Mix for 2–3 minutes until the dough is smooth, moist, and uniform. It should resemble thick mashed potatoes. Let sit for 5 minutes to allow the cornmeal to fully hydrate.
-
Shape the arepas: Heat a griddle or large skillet over medium-high heat. Lightly oil or butter the surface. Wet your hands with water to prevent sticking. Take about 60 ml (0.25 cup) of dough and form it into a ball, then gently flatten it between your palms into a disk about 1.25 cm (0.5 inches) thick. Place on the hot griddle.
-
Cook the first side: Cook for 4–5 minutes until the bottom is golden and lightly browned, with a thin crust forming. Use a spatula to gently flip.
-
Cook the second side: Cook for another 4–5 minutes until the second side is golden and a thin crust has formed all over. The arepa should sound slightly hollow when tapped. Transfer to a plate and keep warm while you cook the remaining arepas.
-
Prepare for filling: Once all arepas are cooked, carefully slice each one in half horizontally to create a pocket, being careful not to split it completely. Gently open the pocket and stuff with your choice of filling—shredded chicken, refried beans, sliced cheese, avocado, or a combination. Serve warm.
Tips for success
- Use the right cornmeal: Look for “masarepa” (pre-cooked cornmeal) or finely ground polenta, not regular cornmeal flour, which won’t hold together properly.
- Don’t skip the water resting time: Letting the dough sit for 5 minutes allows the cornmeal to absorb moisture and creates a better texture.
- Wet your hands: This prevents the dough from sticking while shaping.
- Keep arepas warm: Stack finished arepas in a clean kitchen towel to keep them soft and warm while you cook the rest.
- Prep fillings ahead: Shred the chicken or warm the beans before you start cooking the arepas so everything is ready to go.
Variations / Storage
- Cheese and jalapeño: Stuff arepas with grated cheese and sliced jalapeños for a spicy kick.
- Refried beans and avocado: Layer warm beans with sliced avocado, cilantro, and a squeeze of lime.
- Shredded beef: Use seasoned shredded beef (cooked and cooled) for a heartier filling.
- Vegetarian feast: Fill with sautéed vegetables, black beans, and crumbled cheese.
- Storage: Store cooled arepas in an airtight container in the refrigerator for up to 3 days — storage life varies with conditions. Reheat in a skillet over medium heat for 2–3 minutes per side until warmed through, or wrap in a damp paper towel and microwave for 1 minute.
FAQ
Q. Can I make arepas ahead of time?
A. Yes. Cook them, let them cool, and store in the refrigerator. Reheat on a griddle before filling, or warm and fill just before serving.
Q. What if my arepas are too dry?
A. Add a bit more water to the dough next time—it should be moist but not wet. You’re aiming for a texture like thick mashed potatoes.
Q. Can I use masa harina instead of cornmeal?
A. Masa harina (corn flour used for tortillas) has a different texture; it’s best to use masarepa or polenta for arepas.
Q. Are arepas naturally gluten-free?
A. Yes, when made with cornmeal or masarepa, arepas are naturally gluten-free. Always check that your cornmeal wasn’t processed on shared equipment with gluten products.
Q. What’s the best filling for a quick lunch?
A. Shredded rotisserie chicken mixed with avocado, cilantro, and a pinch of salt is quick, delicious, and requires no cooking.